How to: Install Your Own Lift Kit
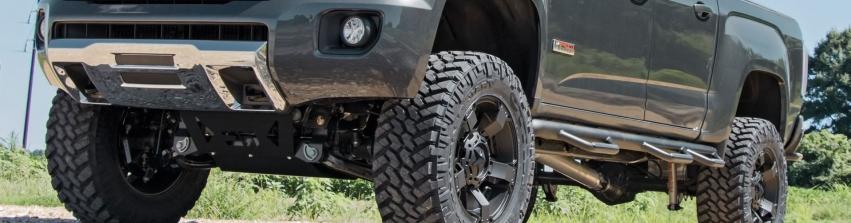


Whether you are lifting your car to accommodate adventurous trails or if you’re making room for some larger tires, you can make it possible with one of our lift kits, the necessary mechanical skills and tools, and some well guided instructions.
1. The first thing you want to do is get the kit! Simply check out our broad online selection and choose the kit that is right for you by clicking here.
2. Make sure you get started on a level surface. If your driveway is at a slope, see if you can make room in the garage.
3. Once you’re on a level surface, make sure to read the instructions that come with your kit very carefully. Chances are, they will begin with telling you to to support each corner of your vehicle on some strong jack stands to secure your safety during the installation, then removing the wheels and tires.
4. The instructions will most likely have you work from the front to back end. So after checking if that is the case, you will need to remove the current shock absorbers and coil springs. This way you can replace them with the taller counterparts from your brand new lift kit. Different kits involve additional adjustments. This is where referring to the kit instructions comes in to play. Each kit varies, so be wary of the instructions and parts included.
5. After replacing and adding the new parts from your kit, and while tires are not yet on the car, have someone else move the steering wheel, while you make sure to watch the moving parts to ensure that everything is moving smoothly. If there happen to be any disruptions in the movement, make sure you resolve the disturbance(s) before operating the vehicle.
6. Once all the kinks have been worked out, you can install the new tires and wheels onto your vehicle. Double check for any further disruptions while you car is both still off the ground then on. When checking while the car is on the ground, do it one side at a time while each sides are jacked up seperately. This way you can maximize suspension flex to brake lines, and make sure the tires are not rubbing on the suspension or any body parts.
7. As soon as your vehicle is back on the ground and ready to rumble, the final step is to take it to an alignment shop for a complete alignment. To safely operate your vehicle and prolong the life of your tires, you will need to fix the alignment that was adjusted when the vehicle was lifted during the installation.
This article is our take on an excellent wikiHow article on lift kit installation. Theirs is geared towards the 1993-1998 (ZJ) Grand Cherokee and 1997-2006 (TJ)Wranglers that have four coil type springs. Ours is simply a broader explanation geared towards all. If you would like to view the original wikiHow article with images, click here.
Happy Trails!